Personalized Portrait Hoodie
The Creative Process of Custom Dog Portrait Embroidery Design from your Photo
Apr
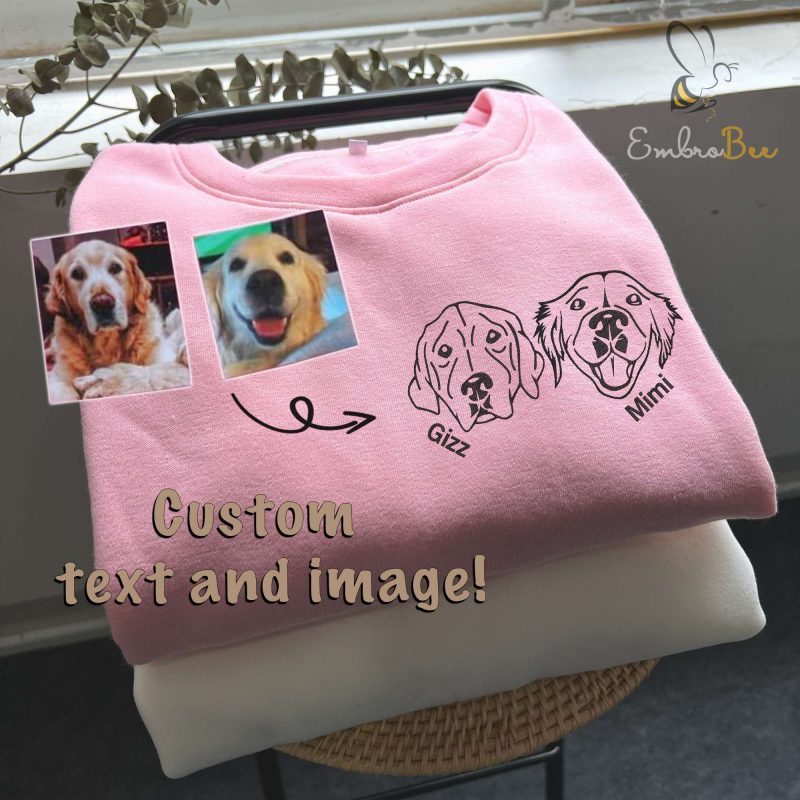
Custom Dog Embroidery Design is a great way to show your love for your furry friend. At EmbroBee, we understand that pets are an important part of many people’s lives so we are passionate about creating unique and personalized dog portrait embroidery design on clothing, especially on sweatshirts, hoodies, and tees. In this blog post, we will explore the creative process of turning your dog into a one-of-a-kind embroidery design.
What is Custom Dog Portrait Embroidery Design?
Custom Dog Portrait Embroidery Design is a type of embroidery design that features a digitized image of a dog. The design is created using a digital image of the dog, which is converted into a format that can be read by an embroidery machine. The digitized image contains information about the stitch direction, density, and type of stitch needed to create the design. The design is then embroidered onto various clothing items, such as sweatshirts, hoodies, and tees, creating a one-of-a-kind piece that showcases the love for their furry friend.
Creative Process of Turning Your Dog into a Custom Embroidery Design on Sweatshirt
Creating a custom dog portrait embroidery design is a meticulous and creative process that requires skill and attention to detail. At EmbroBee, we take pride in our ability to turn your beloved pet into a unique piece of wearable art. We will take you through the step-by-step process of creating a custom dog portrait embroidery design on a sweatshirt. From getting the your image to embroidering the design onto the fabric, we’ll cover everything you need to know. So let’s get started!
Select the Image
The quality and suitability of the image can significantly impact the final result of embroidery, as well as satisfaction with the finished products. Therefore, this is the first important step in the process and we need to customer’s help with the following:
- When you place to order, please submit one or more high-quality photos of your pet.
- We recommend selecting images that show your pet’s face in clear detail, with good lighting and minimal background distractions.
Our team of skilled designers will review the image. If we have any concerns or suggestions, we’ll contact you to discuss the options and make any necessary adjustments to ensure that it will look its best when embroidered onto the fabric.
Make a Simple Portrait of Your Dog (Convert the Photo into a Digital Format)
We start edit the image to highlight your dog’s unique features and personality, and adjust image to ensure that the image is suitable for embroidery by using Adobe Photoshop or Illustrator:
- Open the image in Photoshop
- Crop the image: Use the crop tool to focus on your dog’s face and crop out any unnecessary background or distractions.
- Adjust the image: Adjust the brightness, contrast, and saturation of the image if necessary, to ensure that your dog’s features stand out and are easy to see.
- Create a new layer: Create a new layer and use the brush tool to draw the outline of your dog’s face and features. Use a hard brush with a dark color to create bold, clear lines.
- Add details: Add details to your dog’s face and features, such as eyes, nose, mouth, and fur texture. Use a soft brush with a light color to create shading and highlights, which will give your portrait depth and dimension.
- Save the file: Save your file in a high-quality format, such as PNG or JPEG, to ensure that it can be easily transferred to the embroidery software.
Convert Your Image Into a Digital Embroidery Pattern
Converting your image into a digital embroidery pattern is necessary because embroidery machines can only read and stitch digital files – called digitization. Here are the general steps involved in digitizing an image:
- Import the image: Import edited image into embroidery digitizing software. Many specialized embroidery software programs are available, and some are free to download.
- Create the embroidery design: During the digitization process, the software analyzes the image and creates a map of the embroidery design, including stitch types, stitch directions, and stitch density. This process can be complex and requires a skilled digitizer to ensure that the final embroidery design is accurate and of high quality. Also, add colors and other details or remove some details to enhance the design.
- Define the embroidery area: Define the embroidery area by selecting the size and shape of the hoop or embroidery area. This step ensures that the design fits within the specified area.
- Preview the design: Preview the design to check for any errors or areas that need adjustment. Make adjustments to the stitch types, densities, or other parameters to ensure that the design is accurate and high-quality.
- Export the file: Export the file in the format required by your embroidery machine. Popular formats include DST, PES, and JEF.
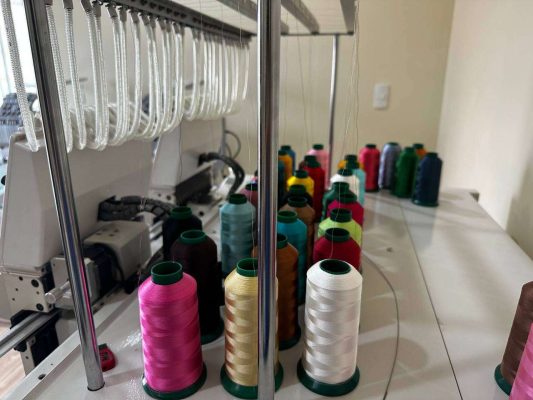
Choose Thread Colors to Custom Dog Portrait Embroidery
Choosing the right thread colors is essential for creating a high-quality custom dog portrait embroidery design. It helps to bring the design to life and create a visually appealing finished product.
- After the embroidery pattern is finalized, we’ll select the appropriate thread colors for each area of the design.
- We use high-quality embroidery threads that are colorfast and resistant to fading, ensuring that your design will look vibrant for years to come.
- Our team carefully matches the thread colors to the digital pattern to ensure that the final product looks just like the original image.
Hoop Fabric and Loading the Design
- With the embroidery pattern and thread colors selected, we’ll hoop the fabric tightly enough to prevent any puckering or distortion during the embroidery process, but not so tightly that it distorts the design or causes damage to the fabric.
- Once the fabric is hooped, we load the digitized embroidery design into the embroidery machine’s computer.
- The machine uses the digital pattern to guide the needle and create the design, stitch by stitch.
- At this stage, we also set the machine’s speed, thread tension, and other settings to ensure that the embroidery is accurate and consistent.
Embroider Custom Dog Portrait Embroidery Design
- With the design loaded and the settings configured, we begin the custom dog portrait embroidery process.
- The machine uses a needle and thread to stitch the design onto the fabric, following the pattern precisely.
- As the machine stitches, it advances the fabric in precise increments, allowing it to create intricate and complex designs with ease.
- Our skilled embroiderers monitor the embroidery process closely, ensuring that each stitch is accurate and that the thread tension is consistent throughout.
Finish Custom Dog Portrait Embroidery Touches
- After the embroidery is complete, we’ll carefully remove any excess stabilizer material and tidy up any loose threads.
- Our team will inspect the finished product to ensure that it meets our high standards for quality and craftsmanship.
- We’ll then carefully package your custom dog portrait embroidery design and ship it to you, ready to wear and enjoy!
Final Thoughts!
Overall, turning a dog photo into fabric is a multi-step process that requires creativity, skill, and attention to detail. We hope that this blog post has provided insight into the process of creating a custom dog portrait embroidery design and love custom dog portrait embroidered items.
At EmbroBee, we take pride in our ability to turn your beloved pet into a unique piece of wearable art. With our meticulous attention to detail and skilled craftsmanship, you can trust that your custom dog portrait embroidery design will be a beautiful and long-lasting tribute to your furry friend. Contact us today to get started!


Custom Embroidered Sweatshirt
Custom Cat Portrait Embroidered Sweatshirt, Pet Portrait Embroidered Sweatshirt

Portrait Embroidered
Pet Memorial Embroidered Hoodie – Personalized Pet Remembrance Apparel

Portrait Embroidered
Custom Pet Face Embroidered Sleeve Sweatshirt – Personalized Pet Apparel


Portrait Embroidered
Custom Dog Mom Sweatshirt Embroidered – Personalized Dog Owner Apparel


Portrait Embroidered
Pet Face Name Portraits Photo Hoodie – Custom Pet Lover Clothing


Portrait Embroidered
Custom Dog Dad Sweatshirt Embroidered – Personalized Dog Owner Apparel

Portrait Embroidered
Custom Pet Portrait Embroidered Hoodie – Unique Pet Lover Clothing


Portrait Embroidered
Custom Dog Embroidered Sweatshirt – Personalized Pet Lover Apparel